
If you’ve ever struggled with patchy foundation, muddy eyeshadow, or unexpected breakouts, your brushes could be the hidden culprit. This article is designed for anyone searching for clear, practical guidance on makeup brush maintenance—because clean, well-cared-for tools are the foundation of flawless makeup application and healthy skin.
Here, you’ll learn exactly how to clean different types of brushes, how often to wash them, which products work best, and how proper storage extends their lifespan. We’ll also break down common mistakes that damage bristles and compromise performance.
Our guidance is based on proven skincare principles, cosmetic hygiene standards, and hands-on beauty expertise to ensure every recommendation is safe, effective, and easy to follow. By the end, you’ll have a simple, reliable routine that keeps your brushes in top condition—and your makeup looking its absolute best.
Your Ultimate Guide to Pristine Makeup Brushes
Dirty brushes harbor bacteria; a 2019 study in the Journal of Applied Microbiology found 79–90% of tested cosmetic tools carried potentially harmful microbes. Consequently, breakouts and irritation spike when brushes aren’t cleaned weekly. Proper makeup brush maintenance isn’t optional—it’s skin care. First, rinse bristles downward to protect glue bonds. Then cleanse with gentle soap, swirl, and rinse until clear. Dry flat to prevent water damage. According to the American Academy of Dermatology, clean tools reduce acne risk. In short, cleaner brushes mean smoother blending and healthier skin. (Yes, your foundation will thank you.)
Why Clean Brushes Are Your Skin’s Best Friend
First and foremost, dirty brushes can sabotage your skin. Over time, bristles collect a mix of bacteria (microscopic organisms that can trigger infections), dead skin cells, and oil. When you sweep that buildup across your face, it can clog pores—tiny openings in the skin that release oil—and lead to breakouts. In fact, dermatologists note that acne-causing bacteria thrive in oily, unwashed tools (American Academy of Dermatology). If you’re battling “mystery” pimples, your blush brush might be the culprit.
Equally important, clean brushes dramatically improve application. Caked-on pigment creates streaks and muddy blending. Fresh bristles, on the other hand, distribute product evenly for that smooth, filtered finish (no ring light required).
Finally, regular cleaning protects your investment. Quality brushes aren’t cheap. Gentle washing preserves bristles, prevents shedding, and protects the ferrule—the metal part that holds bristles in place. Consistent makeup brush maintenance means your tools last for years, not months.
Gather Your Cleaning Arsenal: Tools of the Trade
By keeping your makeup brushes and tools in top condition, you not only enhance your application process but also ensure that your shades, like the perfect Zosisfod eyebrow color you choose, look their best for longer – for more details, check out our What Shade Of Zosisfod Eyebrow Should I Use.
Before you start, assemble the right tools—because great makeup brush maintenance begins with smart prep.
-
The Cleanser: Baby Shampoo vs. Brush Soap vs. Micellar Water
Baby shampoo is gentle and budget-friendly (think mild enough for a newborn). Specialized brush soaps, however, are formulated to break down stubborn pigment and oil—ideal for dense foundation brushes. Micellar water works best for quick spot cleans, especially on synthetic brushes. Natural bristles, on the other hand, benefit from conditioning formulas to prevent dryness (much like hair). -
The Cleaning Surface: Silicone Mat vs. Your Palm
A textured silicone mat loosens deep-set makeup efficiently. Meanwhile, your palm works perfectly for lighter, everyday washes. -
The Rinsing Station: Bowl vs. Running Water
A bowl offers control; lukewarm running water speeds things up. -
The Drying Tools: Microfiber Towel vs. Standard Towel
Microfiber absorbs more moisture and reduces frizz, while a counter edge helps brushes dry in proper shape.
The Foolproof 5-Step Brush Cleaning Ritual
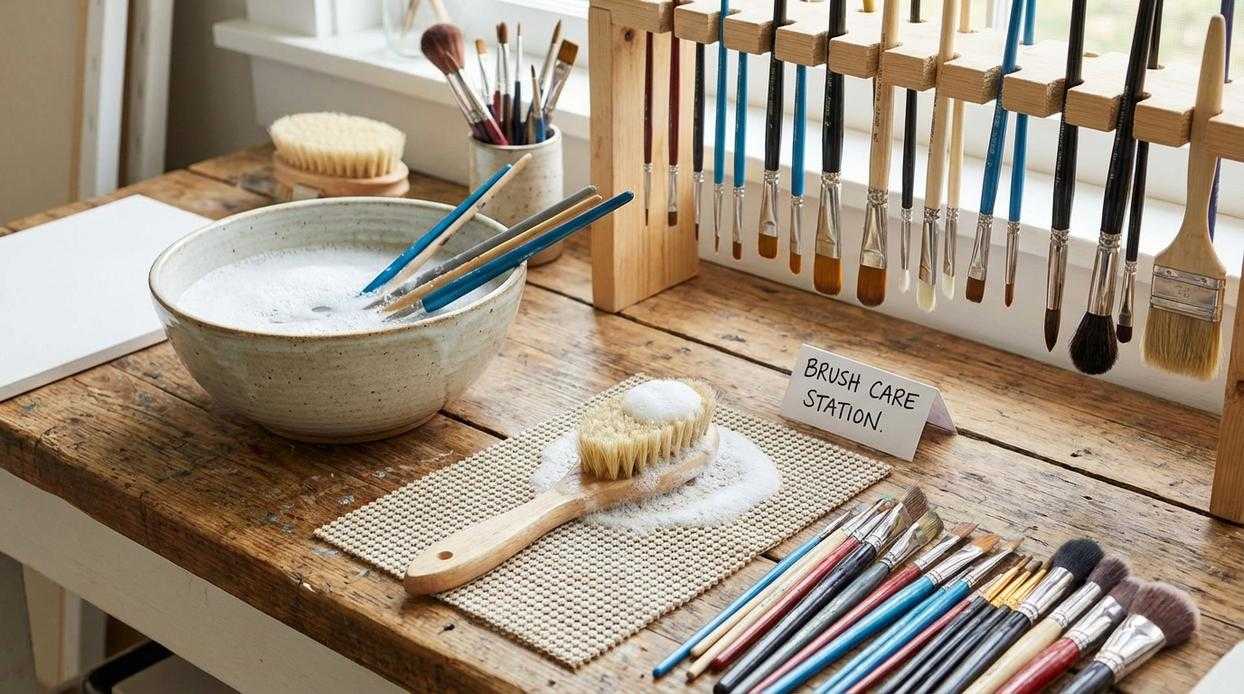
Clean brushes aren’t just about appearances—they protect your skin, improve blending, and extend the life of your tools. Here’s the simple, effective method that delivers visible results every time.
Step 1: Wet the Bristles
Run the bristles (and only the bristles) under lukewarm water. Always point the brush downward. This prevents water from loosening the glue inside the ferrule (the metal band that holds bristles in place). The benefit? Longer-lasting brushes and fewer stray hairs on your face.
Step 2: Add Cleanser & Lather
Place a drop of cleanser onto your palm or a silicone mat. Swirl gently until a light lather forms. This lifts trapped pigment, oil, and bacteria—key culprits behind breakouts.
Step 3: Work Through the Bristles
Massage from base to tip. You’ll literally see old makeup rinse away (oddly satisfying). Cleaner bristles mean smoother, truer color payoff.
Step 4: Rinse Until Clear
Rinse downward again until water runs clear. Any leftover residue can stiffen bristles and affect application.
Step 5: Squeeze & Reshape
Gently press out excess water and reshape the head. Proper drying prevents splaying and keeps your brush performing like new.
Consistent makeup brush maintenance saves money, improves hygiene, and elevates every look. For even better results, pair this ritual with smart product rotation and storage. If you’re unsure when to toss old items, review understanding product expiration dates and safety to protect both your skin and your investment.
The Art of Drying and Storing Your Brushes Correctly
In humid cities like Miami or during monsoon season in Manila, drying technique isn’t optional—it’s survival. After washing, lay brushes flat on a clean towel with the bristles hanging slightly over the counter edge. This encourages full air circulation and helps prevent mildew (yes, that faint musty smell is trapped moisture). Think of it as makeup brush maintenance done the pro way—like backstage artists prepping kits for Fashion Week.
Never dry brushes upright while wet. Water seeps into the ferrule—the metal band connecting handle to bristles—weakening the adhesive and causing shedding. Some argue upright drying “saves space,” especially in small NYC apartments, but replacing ruined brushes costs more than clearing counter space.
Once fully dry (about 6–12 hours, depending on climate), store upright in a holder to maintain shape. Traveling? Use a brush roll to avoid crushed bristles and uneven blending.
For Liquid Products (Foundation, Concealer, Cream Blush): Deep clean once a week. These brushes hold moisture, which can encourage bacteria growth (yes, even if they look clean). Have you ever wondered why your skin suddenly breaks out? This could be why.
For Powder Products (Eyeshadow, Powder, Bronzer): Deep clean every 1–2 weeks. While powders seem harmless, buildup dulls color payoff over time.
For Spot Cleaning: In between deep cleans, use a daily cleansing spray on a paper towel to remove pigment—especially when switching shades.
Consistent makeup brush maintenance keeps application smooth and skin happier. Sound familiar to your routine today?
Make It a Weekly Ritual
You now have a simple, proven method to achieve healthier skin, smoother application, and tools that last. More importantly, it saves you from breakouts caused by dirty brushes and uneven blending. That is where consistent makeup brush maintenance makes the difference. Set aside ten minutes this week, follow the five steps, and let your tools dry completely. After that, notice how your foundation glides on and your skin feels calmer. Once you see the results, keeping this ritual will feel effortless. Small habits create visible change, and this one quickly becomes a nonnegotiable part of your routine. Start today, confidently.
Elevate Your Beauty Routine with Confidence
You came here looking for real, practical ways to improve your routine — and now you have them. From refining your skincare steps to perfecting application techniques and staying consistent with makeup brush maintenance, you’re equipped with the knowledge to get better results from the products you already love.
The truth is, inconsistent routines, product buildup, and avoidable mistakes are often what stand between you and that smooth, radiant Moni Glow finish. When your tools aren’t clean or your steps aren’t optimized, your makeup won’t sit right — and your skin can suffer for it.
Now it’s time to take action. Commit to a smarter routine, clean your brushes regularly, and choose formulations designed to enhance your natural glow. If you’re ready to stop wasting products and start seeing real results, explore our top-rated beauty guides and Moni Glow essentials today. Thousands trust our expert-backed insights to transform their routines — you should too. Start now and give your skin and makeup the care they truly deserve.
 Geldric Nemsor is the kind of writer who genuinely cannot publish something without checking it twice. Maybe three times. They came to skincare techniques and routines through years of hands-on work rather than theory, which means the things they writes about — Skincare Techniques and Routines, Beauty Product Optimization Tips, Beauty Buzz, among other areas — are things they has actually tested, questioned, and revised opinions on more than once.
That shows in the work. Geldric's pieces tend to go a level deeper than most. Not in a way that becomes unreadable, but in a way that makes you realize you'd been missing something important. They has a habit of finding the detail that everybody else glosses over and making it the center of the story — which sounds simple, but takes a rare combination of curiosity and patience to pull off consistently. The writing never feels rushed. It feels like someone who sat with the subject long enough to actually understand it.
Outside of specific topics, what Geldric cares about most is whether the reader walks away with something useful. Not impressed. Not entertained. Useful. That's a harder bar to clear than it sounds, and they clears it more often than not — which is why readers tend to remember Geldric's articles long after they've forgotten the headline.
Geldric Nemsor is the kind of writer who genuinely cannot publish something without checking it twice. Maybe three times. They came to skincare techniques and routines through years of hands-on work rather than theory, which means the things they writes about — Skincare Techniques and Routines, Beauty Product Optimization Tips, Beauty Buzz, among other areas — are things they has actually tested, questioned, and revised opinions on more than once.
That shows in the work. Geldric's pieces tend to go a level deeper than most. Not in a way that becomes unreadable, but in a way that makes you realize you'd been missing something important. They has a habit of finding the detail that everybody else glosses over and making it the center of the story — which sounds simple, but takes a rare combination of curiosity and patience to pull off consistently. The writing never feels rushed. It feels like someone who sat with the subject long enough to actually understand it.
Outside of specific topics, what Geldric cares about most is whether the reader walks away with something useful. Not impressed. Not entertained. Useful. That's a harder bar to clear than it sounds, and they clears it more often than not — which is why readers tend to remember Geldric's articles long after they've forgotten the headline.